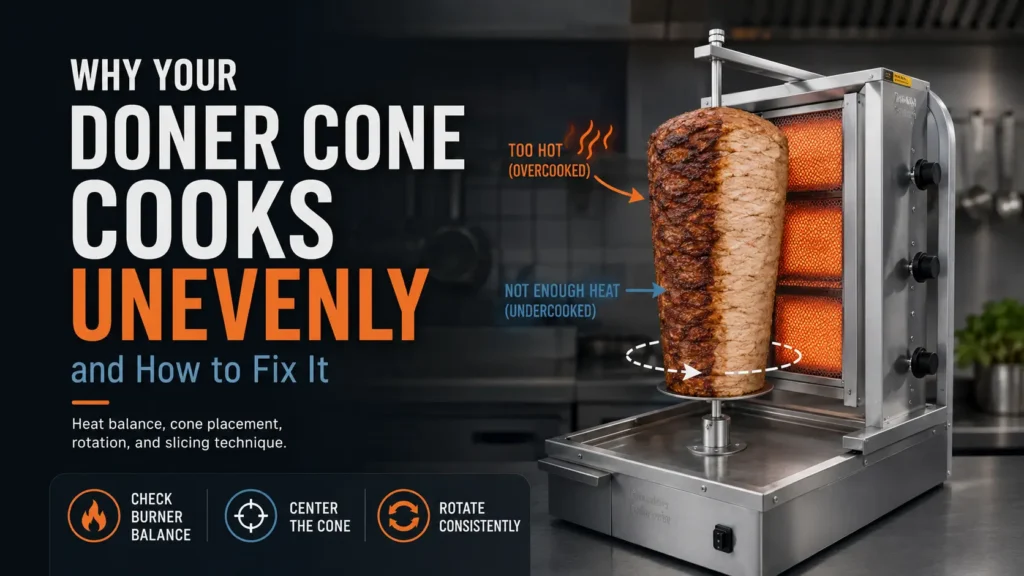
A doner cone that cooks unevenly is one of the most frustrating problems behind any kebab counter. You pull off a beautifully charred outer layer, only to find the meat underneath still pale and undercooked. Or one side of the cone browns perfectly while the other refuses to take on any color at all. The result is wasted protein, slower service, and customers who can taste the difference.
The reassuring part is that uneven cooking almost never comes down to bad luck. In most cases it traces back to a small set of mechanical and setup issues, and each one has a clear, practical fix. Once you know what to look for, you can solve the majority of these problems in a few minutes without calling out a technician.
This guide breaks down the real reasons a vertical rotisserie cooks unevenly and walks you through how to correct each cause. Whether you run a high volume takeaway or a busy full kitchen, these checks will help you get a clean, even crust from the top of the cone right down to the base.
The Shape of Your Meat Cone: Why Symmetry Matters
Everything starts with how the cone is built. A doner that bulges on one side, leans slightly, or tapers in the wrong place will never cook at an even rate, no matter how good your grill is. The heat hits the closest part of the meat first, so any uneven surface creates hot spots and cold spots before the motor has even finished a full turn.
When you stack the cone, your goal is a smooth, balanced cylinder that narrows gently toward the bottom. Each layer of sliced proteins should sit flush against the one below it, with no air pockets or loose edges sticking out. Pressing the meat firmly as you build prevents the outer layers from drying out faster than the core and keeps the whole cone rotating in balance.
Pay attention to the top of the cone as well. A peak that is too wide or too flat tends to overcook because it sits closest to the upper burner for longer. Shaping a slightly rounded, tapered tip lets the heat wrap around it instead of scorching one fixed point.
If you regularly find one section cooking faster, check whether the cone is centered on the spit. Even a small offset throws off the spacing between the meat and the heat source, which guarantees an uneven finish over a long shift.
Getting the Distance Right Between Burners and the Meat
The gap between your burners and the surface of the meat decides how aggressively the doner cooks. Too close and the outside chars before the inside warms through. Too far and the surface dries out slowly without ever forming a proper crust. Most uneven cooking complaints come back to this single measurement.
A fresh, full cone sits much closer to the burners than one that has been carved down through the day. This is why a doner can cook beautifully in the morning and then start browning unevenly by mid afternoon. As the diameter shrinks, the distance grows, and the lower burners in particular lose their effect on the thinner part of the cone.
The fix is to adjust the position throughout the service rather than setting it once and forgetting it. Many machines allow you to move the spit closer to the heat or angle the burner panel as the cone gets smaller. Making this small adjustment a habit keeps the cooking consistent from the first cut to the last.
If your current setup does not give you that flexibility, it may be worth reviewing your doner kebab equipment to make sure the burner spacing suits the cone sizes you actually use. A grill built for large industrial cones will struggle to cook a small one evenly, and the reverse is just as true.
Clogged Burners or Low Gas Pressure? Here is How to Check
When only part of the cone cooks while the rest stays stubbornly pale, the burners themselves are usually the first thing to inspect. A single blocked jet or a drop in gas pressure can leave a whole vertical strip of meat without enough heat, and the spinning motion does the rest by spreading that cold zone around the cone.
Run through these checks before you assume the machine is faulty:
- Look at the flame color. A healthy burner shows a steady blue flame. Yellow, orange, or flickering flames point to a clogged port or a fuel mixture problem.
- Check each burner row separately. Light them one at a time and watch for any section that stays weak or refuses to ignite fully.
- Inspect the burner ports for grease and debris. Built up fat and carbon block the jets and starve that area of flame. A cooled burner can be cleaned with a stiff brush and a thin pin for the holes.
- Test for consistent gas pressure. If the flames shrink when you turn on other gas appliances nearby, your supply pressure is likely too low to feed the grill properly.
- Confirm the regulator is rated correctly. An undersized or aging regulator often causes weak, uneven flames across the whole panel.
Once the burners light cleanly and evenly across every row, the heat will spread the way it should. Regular cleaning of the burner area is the single most effective habit for preventing this problem from coming back.
Is Your Motor Spinning Too Fast or Too Slow?
Rotation speed is the quiet detail that most operators overlook. The motor that turns your cone is doing more than keeping the meat moving. It controls how long each part of the surface faces the heat, which directly shapes how evenly the crust forms.
When the motor spins too fast, no single area gets enough exposure to brown properly. The meat heats up overall, but the surface never sears, so you lose that signature crisp edge that customers expect from a good doner kebab. The cone looks cooked, yet every slice feels soft and steamed rather than roasted.
A motor running too slowly causes the opposite trouble. The side facing the burner sits there long enough to scorch, while the shaded side cools down before it rotates back into the heat. You end up carving alternating bands of burnt and underdone meat from the same cone.
The right speed gives each section a short, repeated pass in front of the flame, building color gradually and evenly. If your rotation feels off, listen for a straining or stuttering motor, which often signals worn gears or a failing component. A motor that no longer holds a steady pace is worth replacing before it costs you product on every shift.
How Drafts and Air Conditioning Sabotage Your Rotisserie
Picture a grill placed near an open back door on a windy day. Every gust pulls heat away from one side of the cone, and the burner on that side has to fight just to keep the surface warm. This is one of the most common hidden causes of uneven cooking, and it has nothing to do with the machine itself.
Air conditioning units, extraction fans, and open windows create the same problem in a quieter way. A constant stream of cool air across one face of the rotisserie chills that section faster than the burners can recover. Because the cone keeps turning, that cold zone spreads, leaving you with a doner that never cooks at a steady rate.
The solution is mostly about placement. Position your rotisserie away from direct drafts and strong airflow, ideally against a wall where moving air cannot reach the cone from the side. If relocating the unit is not practical, a simple side shield or panel can block the worst of the draft and stabilize the cooking environment.
It is worth watching the meat during your busiest hours, when doors open and close constantly and the extraction system runs at full power. Many operators discover that their uneven cooking only appears at peak times, and the culprit turns out to be air movement rather than the burners or the motor.
Why Bad Carving Techniques Lead to Uneven Cooking
Carving and cooking are linked more closely than most people realize. The way you slice the cone shapes its surface for the next round of cooking, so a sloppy carving habit creates uneven cooking long after the knife is put down. Deep gouges, ragged edges, and uneven shaving all disturb the smooth cylinder you worked to build.
The goal is to carve thin, even layers across the full height of the cone rather than digging into one favorite spot. When you repeatedly shave the same area, you create a flat face or a dent that throws off the distance to the burners. That dent then cooks differently from the rest of the cone, and the problem feeds on itself with every slice.
Timing matters just as much as technique. Carving too early, before the outer layer is fully cooked, exposes raw meat that has not had its turn in front of the heat. Waiting until each layer browns properly keeps the surface uniform and gives the next layer time to cook before you reach it.
A sharp, well maintained knife makes all of this far easier. A dull blade tears at the meat and forces you to press harder, which damages the surface and pulls the cone off balance. If you want to sharpen your routine, the guides in our How To section cover carving and cooking practices in more detail.
Quick Daily Checks to Ensure a Perfectly Cooked Doner
Most uneven cooking can be prevented with a short routine rather than a major repair. A few minutes of attention at the start and middle of each shift will catch the small issues before they cost you any product. Building these checks into your opening routine keeps the grill working at its best every day.
Run through this quick list during setup and again during a quieter moment in the service:
- Inspect the cone shape for any bulges, dents, or leaning before you switch on the burners.
- Confirm the cone is centered on the spit so the spacing stays even all the way around.
- Light the burners and check the flames for a steady blue color across every row.
- Listen to the motor for smooth, consistent rotation with no straining or stuttering.
- Adjust the burner distance as the cone shrinks through the day to keep the heat effective.
- Check the surrounding airflow and shield the unit from any new drafts or fan placement.
- Wipe down the burner area at the end of the shift to stop grease buildup from blocking the jets.
In short, an evenly cooked doner comes from balance at every stage, from how the cone is stacked to how it is carved. Get the setup right and keep up these simple checks, and uneven cooking stops being a daily battle. If you have worked through these steps and the problem persists, reach out to our team for help matching the right grill to your kitchen.