A doner cone is only as good as the way it is stacked. Get the layering wrong and you end up with dry edges, uneven cooking, and meat that falls apart before it hits the plate. Get it right and every shave comes off crisp on the outside, juicy in the middle, and consistent from the first cut to the last.
Whether you run a busy takeaway or a full production kitchen, the shape and structure of your cone decide how evenly it turns, how it holds heat, and how much waste you throw out at the end of the night. This is where craft meets consistency, and it is a skill worth taking seriously.
Below you will find a practical walkthrough of how to build a doner cone that cooks beautifully and slices clean, from choosing your meat to shaping the final silhouette on the spit.
Start With the Right Meat and Marinade
Everything begins with what goes onto the skewer. The best doner cones use a blend of cuts rather than a single lean piece of meat, because fat is what keeps the cone moist as it rotates in front of the heat. A mix of shoulder, leg, and a measured amount of fat gives you that balance between flavour and structure.
Marinade does more than add taste. The salt in a good marinade helps the proteins bind, which means your layers hold together instead of sliding apart during cooking. Yoghurt, onion, garlic, and a careful hand with spices all play a part, and the meat should rest long enough for the flavours to work through every slice.
Temperature matters more than most people admit. Meat that goes onto the spit too warm becomes soft and hard to stack neatly, while meat that is properly chilled stays firm and grips the layer beneath it. If you want to understand how our prepared blends are built for exactly this kind of stacking, take a look at our range of doner kebab products.
Prepare Your Skewer and Base Plate
Before a single slice of meat touches the spit, the hardware needs to be ready. A clean, dry skewer is non-negotiable, because any grease or leftover residue from the last cone affects how the new one sits and turns. Wipe it down, check the base plate, and make sure everything is properly aligned.
The base plate is the foundation of the whole structure. It carries the weight of the cone and keeps the lowest layers from spinning loose as the spit rotates. A slightly larger, sturdier piece of meat at the very bottom acts as an anchor and gives the rest of the stack something solid to build on.
Alignment is easy to overlook and expensive to get wrong. If the skewer sits off-centre, the cone wobbles, cooks unevenly, and puts strain on the motor. Reliable results start with reliable gear, and choosing the right doner kebab equipment makes the whole process smoother from the first layer to the last shave.
Build Your Layers From the Bottom Up
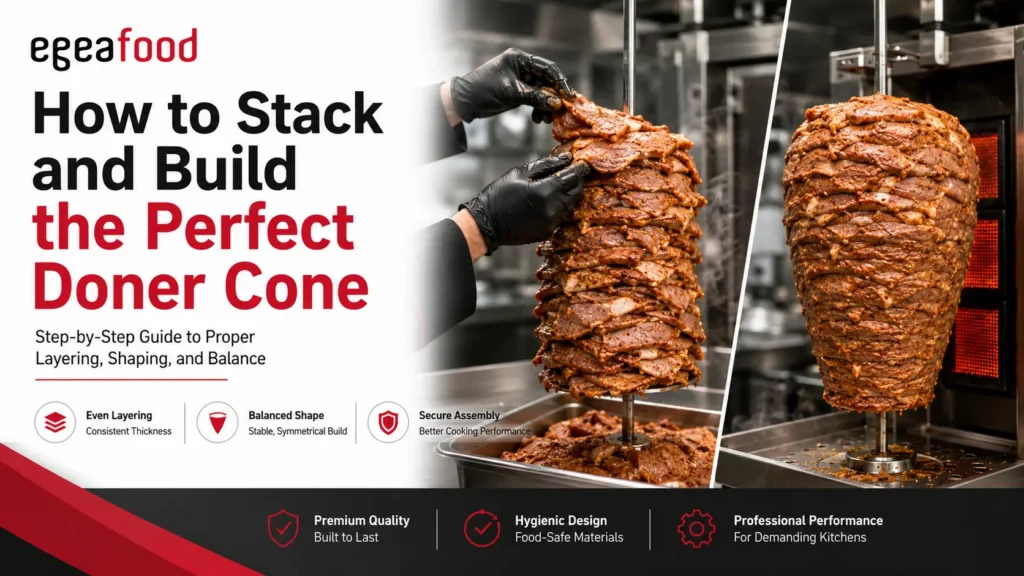
Stacking is the heart of the craft. Each piece of meat should be pressed firmly onto the one below, working steadily from the base toward the top. Loose layers trap air, and trapped air leads to uneven cooking and pockets that dry out or refuse to brown properly.
Think about weight distribution as you go. The heavier, larger pieces belong lower down where they add stability, while the top of the cone can taper into smaller, tidier slices. Pressing firmly is important, but crushing the meat is not. You want it compact, not compressed into a dense block that cooks slowly on the inside.
Keep an eye on the vertical line as the cone grows. Every layer should sit flush with the ones around it so the surface stays smooth rather than lumpy. A bumpy surface catches heat unevenly, which is exactly what you are trying to avoid. Patience here pays off later, because a well-built middle section is what gives you clean, generous shaves during service.
Shape the Cone for Even Cooking
Once the layers are on, the silhouette does the heavy lifting. A proper doner cone is wider at the top and tapers gently toward the bottom, which lets the entire surface face the heat at a consistent angle. This shape is not just tradition, it is physics working in your favour.
There are a few things worth checking as you refine the shape:
- Trim any pieces that stick out sharply, since they burn before the rest of the cone is ready.
- Keep the taper gradual rather than steep, so heat reaches every part of the surface evenly.
- Smooth the outer face with your hands or a flat tool to remove gaps and ridges.
- Make sure the top is neatly capped so it does not dry out and crumble first.
Balance is the goal throughout. A cone that leans to one side rotates unevenly and cooks harder on the heavy face, which wastes meat and slows down service. Step back every so often and look at the cone from a distance to catch any lean before it becomes a problem. In short, a symmetrical cone is a forgiving cone.
Manage Heat and Rotation During Service
A perfectly built cone still needs the right heat to shine. The outer layer should sear and crisp while the meat just beneath stays moist and ready to slice. Too much heat scorches the surface, while too little leaves you shaving off meat that is barely cooked.
Rotation speed works hand in hand with heat. A steady, even turn gives each part of the cone equal time in front of the burner, which is what keeps the cooking consistent from top to bottom. If your cone was stacked properly, this stage becomes far easier, because a smooth surface responds predictably to the heat.
Shaving technique closes the loop. Long, clean strokes with a sharp knife or slicer take off crisp layers without dragging the cone or loosening the structure beneath. Consistent slices are what your customers remember, and they only come from a cone that was built with care in the first place. For a broader look at how prepared products fit into this workflow, our sliced proteins range is worth exploring.
Common Mistakes That Ruin a Doner Cone
Even experienced kitchens slip into bad habits, and most doner problems trace back to the same handful of errors. Recognising them early saves both money and reputation, because a poorly built cone is obvious the moment it starts turning.
Here are the mistakes that cause the most trouble:
- Stacking meat that is too warm, which makes the layers soft and prone to sliding.
- Leaving air gaps between slices, leading to dry patches and uneven browning.
- Building a lopsided cone that rotates unevenly and cooks harder on one side.
- Overloading the skewer beyond what the motor and base plate can handle safely.
- Skipping the resting and chilling steps that keep the structure firm.
The good news is that every one of these is easy to fix once you know what to look for. A little attention during the build stage removes almost all of them before they reach the burner. Kicascly put, prevention during stacking beats damage control during service every time.
Keep Your Cone Consistent From Batch to Batch
Consistency is what separates a good doner operation from a great one. Customers come back for a flavour and texture they can count on, and that reliability starts long before the cone reaches the spit. Standardising your meat blend, your marinade timing, and your stacking method removes guesswork from the equation.
Documenting your process helps more than people expect. When every member of the team stacks a cone the same way, using the same weights and the same shaping steps, your results stop depending on who happens to be working that shift. This kind of discipline is what lets a busy kitchen scale without losing quality.
Sourcing plays a quiet but decisive role here too. Working with a supplier who delivers a stable, well-formulated product means half the battle is already won before you pick up the first slice. If you want to talk through options for your kitchen, our team is easy to reach through the contact us page, and you can browse the full products range to see what fits your setup.
Frequently Asked Questions
How tightly should the meat be packed on the skewer?
Firmly enough that there are no air gaps, but not so tight that the meat becomes a dense block. You want the layers to grip each other while still allowing heat to penetrate evenly during cooking.
Why does my doner cone cook unevenly?
Uneven cooking usually comes from an off-centre skewer, a lopsided shape, or air pockets between the layers. Check that the cone is symmetrical and that every slice sits flush against the one beneath it.
What is the ideal shape for a doner cone?
Wider at the top and tapering gently toward the bottom. This lets the whole surface face the heat at a consistent angle, which gives you even browning and clean, crisp shaves.
Can I use a single cut of meat instead of a blend?
You can, but a blend of cuts with some fat gives a far better result. The fat keeps the cone moist as it rotates, and a mix of textures holds together more reliably than a single lean cut.
How do I stop the top of the cone from drying out?
Cap the top neatly and avoid leaving thin, exposed pieces that catch too much heat. A smooth, well-shaped top cooks at the same pace as the rest of the cone rather than crisping too early.
Does the equipment really make a difference to the final result?
Yes. A clean, well-aligned skewer and a properly sized motor keep the cone balanced and turning smoothly, which directly affects how evenly it cooks and how consistently it slices.